Pages

Saturday, December 18, 2010

The Sweet & Dirty Martini

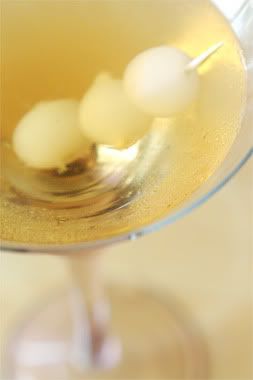
'Tis the season to attend a lot of parties. Parties with cocktails. Cocktails like this darling historical concoction. I love a man with a sense of humor.

Tall, dark, and handsome doesn't hurt either.

There's something just a little illicit about a martini, sexy. They're perfectly acceptable in mixed company, but just a couple. "One is too few, three is too many." It's the Goldilocks of well-made drinks. And they come in the prettiest of glasses. Formidable, instantly recognizable, deliciously mouthwatering. And always with gin. Tanqueray, Hendricks, Bombay Sapphire, take your pick. I like the green bottle, personally.

It's what my dad drinks. He's the one who taught me to enjoy gin.

Of course I've always liked my martinis a little different. And I've never met a bartender I could tell to make it "sweet and dirty" who knew right off the bat what I meant. It's okay. Not quite as funny as the look on their faces when you say you want a virgin martini. Who doesn't like an olive in an empty glass?

The sweet & dirty martini is my favorite. Tweak the classic gin/vermouth recipe a bit and you have my trademark cocktail. When perfectly mixed, the sweet vermouth and dirty olive brine wed perfectly with the gin, making a marvelous ménage à trois of flavors on your tongue. Like a good lover, making you want more.

This isn't your grandfather's cocktail. This is mine. You can get your own.

And of course, cocktail onions over olives.

The Sweet & Dirty Martini

6 parts gin
1 part sweet vermouth
Ice
Cocktail onions and brine

Fill a shaker with ice then add the gin and vermouth. Shake. Strain into a martini glass. Garnish with 3 onions and a dash of brine. Drink.
***
Don't forget the 2011 Calendar is on sale. They make great gifts!

Thursday, December 9, 2010

Easy Breadcrumbs

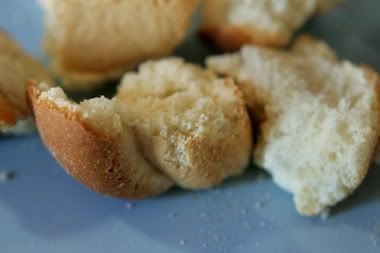
Yes, breadcrumbs. I know, not hard. You take some dry bread and break it into little pieces. Yeah, that's about the extent of this pictorial.

Dry bread (can be dehydrated in the oven at 300 degrees for about 10 minutes)


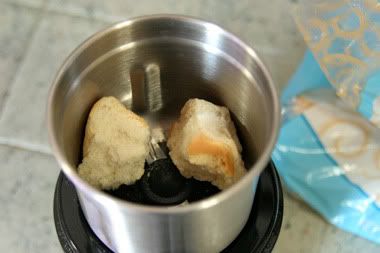
+ food processor or spice grinder (for smaller quantities of crumbs)


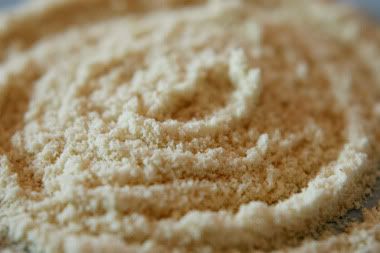
= fine crumbs.


I make them in small quantities as the recipe calls for them, but you can make a large quantity. If there is no oil in the bread, the crumbs will keep on the shelf almost indefinitely. But if yours has butter or oil, store in the fridge (or even freezer).

***

Don't forget the 2011 Calendar is on sale. They make great gifts!

Sunday, November 7, 2010

The Caltech Olive Harvest

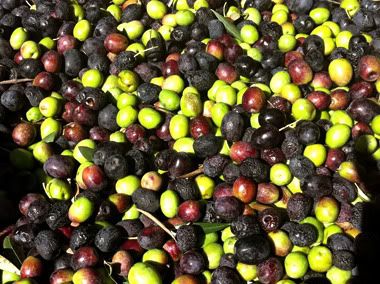
Olives  have a long history. They've been around since just after the dinosaurs died en masse. They probably would have liked olives, had they stuck around. Because olives are delicious.

Caltech in Pasadena, CA is home to an urban (suburban?) olive cache and in recent years they've taken to harvesting them and making olive oil. It turns out this annual event is family friendly and earns participants t-shirts and escargot tastings, so my mom and I took my nephew Alex out for an afternoon of olive pickin' fun.

Upon arrival, we were greeted by huge ladders and cherry pickers, though most teams of students and random attendees seemed to enjoy attacking the trees with rakes and raining olives on their teammates below.

Alex gleefully jumped in to help one team collect the fallen fruits. He refused to give me a good shot of his happy, smiling face, but he did attack the olives like they were candy falling out of a piñata. Clearly the last three years of birthday parties were good training!


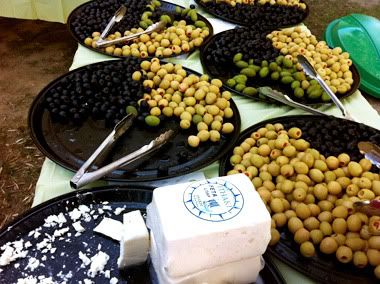
There were also huge trays of cured olives ready for eating. The feta cheese was delicious! Look at those huge bricks! (No, I didn't steal one, despite my addiction-level love of cheese.)

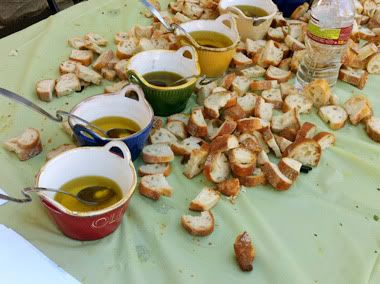
Oh, and the infused oils! They were set out for a blind tasting but I have no idea
what they were infused with, only that they all tasted more like olives than anything. The one in the green ramekin was the darkest of the offerings, and it was the one I liked best. I shamelessly ate about 10 pieces of bread dipped in just that. (Yes, I risked bread poisoning for it. Totally worth it.)

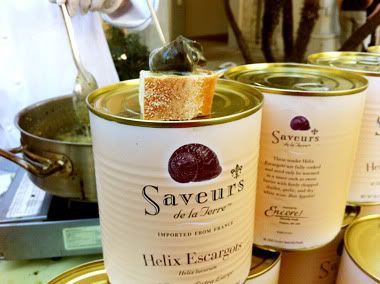
But the true highlight was the escargot being cooked onsite. I know they're an acquired taste for some, but I LOVE them. I tried to convince my mom they taste like mushrooms and, like a good sport, she ate one, but she's not a fan.


I'm still wondering why I didn't bother getting a can. Duh.

As it turns out, the patience of three-year-old being dragged around a college campus is nearly nonexistent, so we only "harvested" for about an hour. I do have to give Alex credit for not complaining much. He did keep repeating his fervent desire for chocolate ice cream, but after his hard work, he earned it. He's such a good kid. Many thanks to his parents for letting me borrow him for an afternoon!

I can't wait to taste the olive oil when it goes on sale next month. And I'm looking forward to going to the harvest again next year. This time, though, I'm totally snagging one of those cans of escargot!

Wednesday, November 3, 2010

Like Girl + Fire on Facebook!

It's HERE! A 12-month calendar illustrating some of the lessons I've learned by cooking in my own kitchen over the last year.

Sure, the calendar will be for sale and all, but don't you want to win a FREE one? Well, between now and Friday, if you become a fan of (aka LIKE) this little food blog on Facebook, you'll be entered in the drawing to win one from the first run, which just arrived yesterday!

I'm super excited about this. It was an endeavor fueled by lots of food experiments, lots of hunching over a camera, lots of swearing at said camera when it wouldn't do what I wanted it to...in other words, my entire heart and soul are in this little calendar and I want to share it with you.

As an added bonus, most of these recipes are new! You haven't seen them here on the blog, and probably won't either. But they are all pretty easy to make and scalable to feed just one person or a whole family. Ranging from a fried hummus to a pumpkin tamale recipe that my own moma native Mexicancouldn't believe when she ate it (she even helped make them and still didn't believe she'd never tasted anything like it), it's all pretty simple but delicious food.

So as a thanks for supporting this blog, and being our fan, we'll give away one of these calendars on Friday. All you have to do is hit the Like button on Facebook! We'll pick the winner on Friday, November 5th at 5 pm PST.

There may be additional familial involvement and a video if we're lucky!

Tuesday, November 2, 2010

Are Cholesterol and Butter GOOD for You?

From SundayMercury.net
This article in the UK-based publication Daily Mail serves up a review of the forthcoming book The Obesity Epidemic: What Caused It? How Can We Stop It? by Zoë Harcombe.

The review details 11 myths about food and obesity, per Ms. Harcombe's "meticulous journey of research into studies that underpin dietary advice." Some of her findings are common sense, like basing a diet on carbs is going to make you fat. But assertions like:
"To pick a number — 5 (mmol/l) — and to say everyone should have cholesterol levels no higher than this is like declaring the average height should be 5ft 4in and not 5ft 9in and medicating everyone who doesn’t reach this meaningless number to reduce their height. It really is that horrific."
sound a bit scary. We've been convinced for the better part of the last generation that high cholesterol WILL kill you. Now...it won't?

Ms. Harcombe is a British nutritionist and self-described obesity researcher. I wonder what American doctors would say to this. I'm not saying she is wrong, I don't have a medical degree or studies with which to refute her. I just wonder if she's actually right, and everything we've been told all along is, in reality, a bunch of bullshit dreamt up by special interests in the food industry to make them richer and us fatter.

Your take?

Wednesday, October 27, 2010

Chopped-Inspired Dinner Party

Chopped is a Food Network show that pits 4 cheftestants against each other and a basket of mystery ingredients. I watch the show to take notes on the different ways the chefs prepare their various ingredients. Some of the baskets confound even the judges (one of whom is Aaron Sanchez, who we partied with on Quatro de Mayo). That's when you know it's good.

So fascinated have I been by the idea of "mystery ingredients" that I decided to host my own dinner party styled after the show. I've finally gotten comfortable enough in the kitchen that I think I can whip up something on the fly. Thankfully my guests didn't make it too hard on me.

Erik, Katie & Adrienne
The instructions to them were simple: each would bring either a protein, fruit/vegetable, and wild card item, and my only restriction would be that the wild card be gluten-free. The Chopped chefs only get 30 minutes to make an entree, but I told them I was giving myself an hour just to be safe. Adrienne arrived first with a bag of cooked baby shrimp. I had expected seafood, so I was relieved. Up next was Katie with herbed goat cheese and a polenta loaf. Finally my brother Erik arrived with oranges.

The goat cheese was camera shy.
My very first reaction to the oranges is not appropriate for young eyes. Suffice to say I panicked for a half-second.

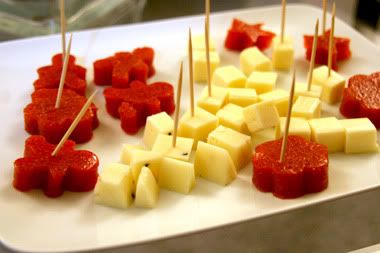
While I loaded them up on wine, cheese, and strawberry jellies, I set to work in the kitchen. Inspiration came from the buns I had anticipated using if ground meat had come through the door (hey, even burgers can be sexy!). I grabbed my favorite kitchen tool (the mini chopper attachment on my stick blender) and set to blending the shrimp, goat cheese and orange zest together. I didn't know what it would taste like, but it sounded like a good idea. My brother wandered in at that point to shoot some video and ask if we were having shrimp shakes. He was slightly disappointed when I said no.
Appetizers

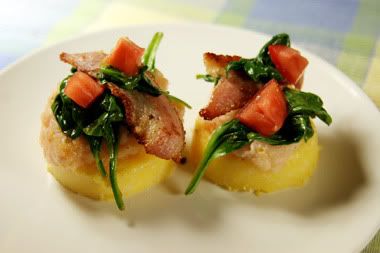
At first I thought I'd make shrimp pâté burgers with the polenta rounds as the bread. Then I thought about doing Napoleons. But something was missing. We had yellow bases topped with orangey-pink goop. It needed greenery. And bacon, because everything is good with bacon. So out of the fridge came the bacon and a bag of spinach. Bacon fried up and then the spinach sautéed nicely in its drippings.

Finally it was time to plate. A diced Roma tomato added the final touch.

I waited cautiously for everyone's reactions. My brother was the first to speak up, saying he thought the orange zest added a really good, interesting flavor. The girls agreed and we all dug in with gusto. Erik went on to eat four Napoleons. So at the very least I know he really liked them.

It was a lot of fun and I can't wait to do it again. Maybe will become the new Saturday Night Test Kitchen! (As I was writing this, I realized that Napoleons are supposed to be stacks of repeated layers, and these weren't exactly that. But that's why artistic license exists, right?)

Polenta & Shrimp Pâté Napoleons
yields approximately 5 servings

1 pound of cooked baby shrimp (250-350 per pound)
3 ounces of fine herb goat cheese
1 tablespoon of orange zest
1 pre-made polenta tube
1 tablespoon of sunflower oil
8 pieces of bacon
1 six-ounce bag of baby spinach
1 roma tomato, diced

1. In a food processor, blend together the shrimp, goat cheese and orange zest. Pose for pictures.

2. Cut polenta into 1/4-inch rounds and sauté in the sunflower oil until a slight crust develops on both sides.

2a. Answer questions for the camera man when he wanders in asking about shrimp shakes. Give him more wine.

3. While the polenta is sautéing, cut the bacon in half cross-wise and fry in a separate pan. Remove to a dish lined with paper towels and reserve the pan drippings. Wilt the spinach in the drippings. Sauté just until the leaves wilt and turn slightly dark.

4. To serve, place the polenta in the center of the dish. Top it with the paté, spinach, a slice of bacon (or cut in half again to make the decorating process easier). Add a couple pieces of chopped tomato and serve.

5. Drink more wine.

My brother's funny little video of the night is available on our new Facebook page. Click here to Like Girl+Fire and watch a two and half minute recount of our Chopped-inspired night (Kevin Bacon may or may not make a cameo in the video...).

Thursday, October 21, 2010

Tuesday, October 19, 2010

Corks Needed!

Remember this awesome cork bath mat we here at G+F wanted? Well here's the sad truth about where we are with the cork collection:


We need more corks! Please save your corks and send them to us. We are available for local pick up. Or if anyone has a connection to a wine store/bar, we will gladly relieve them of their cork clutter!

Pretty please?

Thursday, October 14, 2010

Bacon-Infused Scotch

Bacon is all the rage, some might even say it's passé. Being a staple of morning dining across this country, I scoff at that notion. Bacon is here to stay.

I'll eat bacon in just about anything. My friend Oakley, knowing about my love for both bacon and scotch, mentioned she was making bacon bourbon after our volunteering stint at the OC Foodie Fest. I'd never heard of such a thing but it sounded fantastic. Bacon-flavored alcohol! The problem is, I don't keep bourbon in the house. I wouldn't even know what a decent bourbon tastes like (a visit to Kentucky will need to be had). But I do love its foreign cousin scotch. So much so that friends have taken it upon themselves to gift me random bottles for birthdays. These are the types of gifts you must accept graciously and politely.

But finally, I found a remedy for the glut of harsh spirits haunting my liquor cabinet: bacon! There was one particularly rough scotch that a well-meaning man brought to me on a first date many years ago. Sitting on the shelf for a few additional years had done nothing to mellow its punch. So it was the perfect test.

Oakley's recipe was simple: add bacon fat to a bottle of liquor, let sit, freeze, then fish the fat out a day later. The result was a much smoother, less harsh alcohol.

I wouldn't try this with the higher-end scotch. You don't mess with a good thing. But it's a great recipe for the more run-of-the-mill varieties.


Bacon-Infused Scotch

3-4 strips fatty bacon
1 tablespoon freshly rendered bacon fat
1 bottle of scotch

1. Fry up the bacon. Save a tablespoon of bacon fat. Eat the bacon. (If 3-4 strips doesn't give you a full tablespoon, fry some more!)

2. Pour the scotch into a clean, wide-mouth container. You don't want to put the bacon fat in the alcohol's original bottle because some might get stuck in there, which leads to floating fat globules and that's not pretty.

3. Let the mixture marinate overnight.

4. The next morning, stash the mixture in the freezer. Scotch doesn't freeze, but the fat will. After a few hours, the fat will be solid, making it very easy to fish out. Even easier if you used a wide-mouth container.

5. Strain the alcohol back into its original bottle.

Your scotch is now ready to drink. Mmm.

Saturday, October 9, 2010

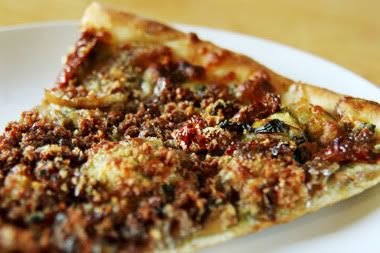
Balsamic Pesto Pizza at Rosti Tuscan Kitchen

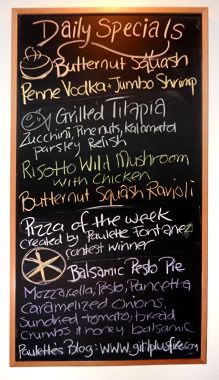
A few weeks ago a few bloggers picked my pizza as the upcoming Rosti Tuscan Kitchen Pizza of the Week. And that week was this past week!

The Pizza of the Week is displayed on their Specials board, which means that everyone walking in the doors saw it up on their wallas well as a shout-out to this here blog. So if you've found yourself here by way of Rosti's chalkboard, ¡hola!

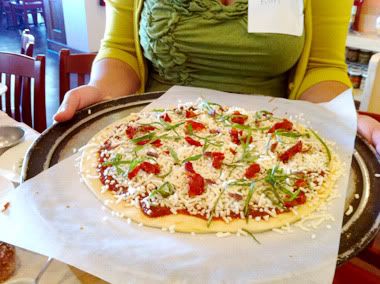
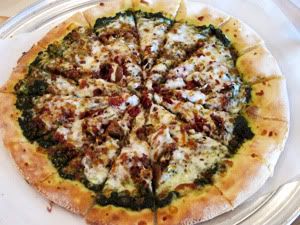
Rosti has two locations, so I had to try it at both (well, at least the toppings, since I hadn't asked for a gluten-free version). The pizza that was served was, of course, different than what I created. But that's the great thing about food: ingredient lists are guidelines. My original pizza was very cheesy. The pie at the Encino location came with extra caramelized onions while the one at the Santa Monica restaurant had far fewer.

Original + Encino Pizza + Santa Monica Pizza
Everyone who tried it seemed to really enjoy it (or, at least, that's what they told me). It paired really well with the Coppola Diamond Zinfandel (that we ordered by the bottle—twice). We happened into the Encino location on Wednesday, when wine is half-price by the bottle. Lucky us!

The recipe is as follows, sans quantities so you can tweak to your taste buds (and also because I didn't measure them when making it). It's good, I promise! And 11 food bloggers can't be wrong.


Balsamic Pesto Pizza

Pizza dough, rolled to a 10-inch disc
Pesto*
Caramelized onions
Honey balsamic dressing*
Sun-dried tomatoes
Pancetta, crumbled
Balsamic vinegar
Mozzarella, shredded
Italian breadcrumbs

1. Pre-heat the oven to 400 degrees. Roll the dough out over a floured surface.

2. Soak the caramelized onions in the honey balsamic dressing.

3. Top the dough with a generous helping of pesto. Add the onions and the dressing marinade, along with the tomatoes, pancetta, and balsamic vinegar. Add a generous amount of shredded mozzarella, then top with a handful of bread crumbs.

4. Bake in a 400 degree oven for 10-15 minutes. Serve piping hot, being careful not to burn your mouth.

* Rosti's proprietary ingredients
I suppose you could use a pre-made crust, though recipes for making dough abound all over the internets. The pesto and honey balsamic dressing recipes are also up for interpretation since they are Rosti's proprietary creations, but those recipes are also available everywhere, even here.

Rosti's contest is ongoing. You too can win bragging rights AND free pizza for a year. Go to their Facebook page for details.

Friday, September 24, 2010

Quinoa Cereal

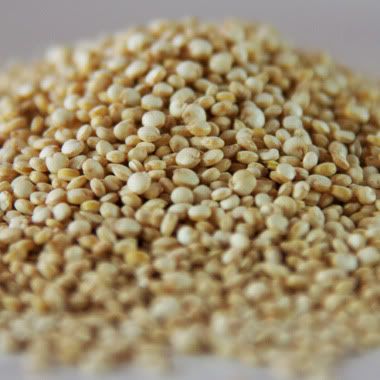
Quinoa is one of those magical protein-rich foods that dates back to the Inca civilization of pre-Hispanic Peru. The first time I had it I couldn't stand it. But that's because I was trying to make some sort of stew with spinach and it failed in every which way.

I finally learned how to cook it properly (hint: don't drown it in chicken broth like I did the first time) and now it has replaced rice in my kitchen. It basically cooks the same way: 1 part quinoa to 2 parts liquid. And since I usually make it to pair with meat, that liquid could be water or any number of broths. But when I decided to boil it in milk, that's when I realized what a great breakfast cereal this could be.

In a word: delicious. And a single bowl has so many nutrients, you may never die should you eat this regularly. Ok, that's a lie, but the health benefits are laid out in plain English on The World's Healthiest Foods.

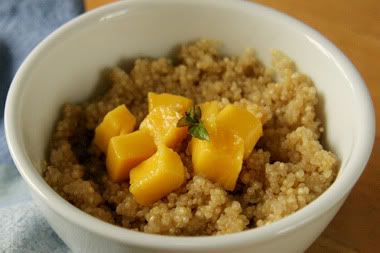
A single serving is a quarter cup. Boil that up in the morning with your favorite type of milk (I like unsweetened almond milk), throw in some fruit, and you have breakfast:


Though I'd never seen a recipe call for this preparation, I know I couldn't be alone in my breakfast-y application. The very first time I made this, I went searching for other like-minded folks and found Sarah of Food Cite. Like me, she is trying to avoid death by cooking quinoa as often as possible.

Quinoa Cereal
yields 1 serving

1/4 cup quinoa
1/2 cup milk (rice, almond, cow, etc.)
Sugar or honey (optional)

1. Rinse the quinoa until the water runs clear. This helps remove some of the bitterness.

2. Place quinoa and milk in a small sauce pan and bring to boil. Simmer uncovered until all liquid is absorbed (about 5-10 minutes).

3. Serve piping hot and steam your pores at the same time. Or cool to a non-lethal temperature and sprinkle or drizzle in your sweetener of choice (if using, I find the almond milk has just enough natural sweetness).

This goes especially well topped with a sweet mango. Or bananas. Or blueberries. Pick a fresh fruit. You really can't go wrong.

The recipe doubles and triples really easily. Simply keep the 1:2 ratio of quinoa to liquid. Cooking time will increase as well. 2 cups of quinoa in 4 cups of milk will take about 15 minutes.

Monday, September 20, 2010

Rosti Tuscan Kitchen Pizza Challenge

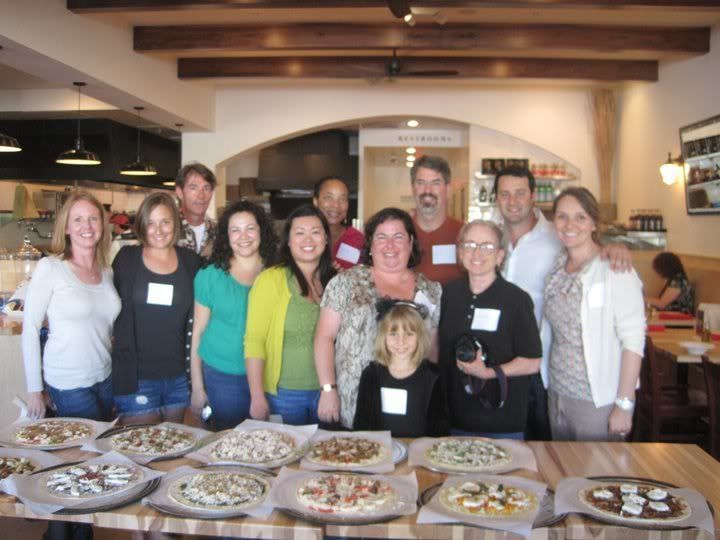
The bloggers,
picture courtesy of Rosti Tuscan Kitchen
Last week a few of LA's food bloggers were invited to Rosti Tuscan Kitchen to create something new for their Pizza of the Week menu feature. The guest list was intimidating; a bunch of people whose blogs I adore and then little ol' me:
Some of these bloggers are real chefs, not just novice food enthusiasts like me. And up for grabs was the bragging rights of having your pizza featured on Rosti's menu for the first week in October plus free pizza for an entire year. Surely the pros had this, right?

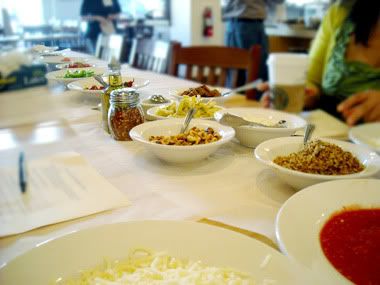
All the fixings
We were each given a disc of pre-rolled dough and the ingredients were laid out on a long table for us to mix and match. Among the offerings were mozzarella, pesto, bell peppers, smoked gouda, hazelnuts, meatballs, olive oil, balsamic vinegar, and my new favorite: caramelized onions. We could also use anything else they might have in the kitchen, so I opted for pancetta. Like bacon, pancetta makes everything better.

Greg, gloved and ready 
to make pizza
The intimidating crowd of food experts were actually really cool, down to earth, welcoming people. I got to sit right across the table from Greg, whose baby artichokes recipe was one of my recent experiments. We grabbed our ingredients and went to work on our naked pizza dough.

Some of the pizzas made were absolutely beautiful. While I just threw mine together and made it look like a standard pie, most everyone else took the time to make art.

Kim shows off her beautiful pie
Then it was time to taste and judge. Given my dietary concerns, I was very careful to eat the least amount of crust possible but still get the full flavor of each slice. They were all delicious in different ways. Erika made a paste out of figs and goat cheese for hers. Kim used the anchovies and balsamic to make an interesting sauce. Lynne topped hers with shrimp. There was a lot of joking around the table and many compliments to each pizza.

Finally the votes were tallied and the winner was announced. In third place was Lucy's with butternut squash, gorgonzola, and sage. Greg came in second with his onions fried in balsamic vinegar creation. And the person to get a year's worth of free pizza with a pesto and honey balsamic combo was...me! I couldn't believe it. Apparently I produced a crowd favorite:

The Balsamic Pesto Pie, photo courtesy of Erika Kerekes
Many thanks to Rosti Tuscan Kitchen for inviting us all to play with their menu and to my fellow pizza-making comrades for voting my pizza numero uno. (Bad pun.) It was a fun afternoon!

The pizza will be on the menu the first week in October. I'll post the recipe in the days leading up to that. For now, become a fan/like Rosti's Facebook page and check out more pictures from this event.

Thursday, September 16, 2010

Time to Lose the Wheat and Eggs?

Dear body, please forgive me for eating bread.

I was diagnosed with a mild wheat allergy about two years ago. Not gluten, but wheat. Which meant I could still eat other gluten-laden offerings like barley and beer. (I might be in denial.)

There is also a complication with eggs. At one point I was allergic to yolks. Now I'm supposedly allergic to whites. For the longest time, I simply avoided both. But I was making quickie muffins for a movie night at my house, so I threw in just one whole egg in with the gluten-free bake mix.

The truth is, I'm not really sure what is wrong with me. Have I had eggs? Bread? Ok, yes...there was tuna tartare in these cute little edible cups and I couldn't resist. But I've never had a reaction last this long. For all I know, I'm just fighting a stomach flu bug.I need to see a doctor. I need to concentrate on eating more fruits and veggies. And meat. And cheese. And all the other wonderful things in this world that, luckily, I CAN still ingest. (Like tequila.)

And I need to find baking recipes that don't require eggs OR wheat-based flours. If anyone has recipes or information on wheat- AND egg-free meals, I'd be delighted. At this point, I can use all the help I can get.

Friday, September 10, 2010

Sweet & Spicy Poblano Pepper Jam

Remember back when I was afraid of canning? Well I got over that fear right quick after the public jam. And I couldn't wait to try it with peppers!

Well, peppers and other fruits. Despite my cultural roots, there might actually be such thing as too many peppers. I didn't want to burn my tongue right off. So I seeded and chopped up a pound of jalapeños and poblanos, and then added pluots, figs, kumquats, basil andbecause I wanted the jam to be a deep, dark red colorblueberries. It made a beautiful rainbow of flavors in the bowl.

I also didn't want a particularly sweet jam, so I held back on the sugar. The pectin I used was a "no sugar needed" variety. But because I've come to learn that sugar is both a preservative and responsible for color vibrancy, I did add 2 cups of it. Just to be on the safe side.

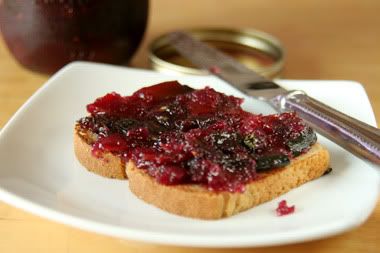
The experiment paid off. It looks like any sweet berry jam but with just enough heat. As one friend described it, "it's like a party in your mouth! You're expecting it to be sweet, but the spice hits you...then the sweet follows!" Which is exactly what I was aiming for. I swear.

My family can't get enough of this. They'll use it on toast, in fruit salad, as a meat topper, etc and so on. I like it as a snack, on top of pieces of truffle cheese or even queso fresco.


Sweet & Spicy Poblano Pepper Jam
yields 2 pint jars

1/2 pound poblano peppers (also called ancho chile peppers)
1/2 pound jalapeño peppers
5-6 medium figs
2 pluots
1 cup blueberries
1/2 cup kumquats
2 tablespoons basil chiffonade
2 cups sugar
1 cup water
1 packet of no-sugar-needed pectin

1. Remove the seeds from the peppers. Chop the peppers, figs, pluots, and kumquats into similar-sized pieces. (Note: use gloves when dealing with the peppers! I touched my lip hours after I'd made thishours after I'd washed my hands several times overand still managed to have burning lips for a while.)

2. Put the peppers and fruits into a large pot with the pectin over medium high heat and bring to a full boil. This should take 5-10 minutes. Stir to incorporate the pectin, and continue stirring occasionally to prevent scorching.

3. After reaching a full boil add the sugar and basil, stirring to incorporate. Boil hard for about a minute. Remove from heat.

4. Skim off the foam if it bothers you. Transfer the jam to sterile jars and proceed with water bath or vacuum sealing.

5. Refrigerate after opening.
Be sure to hide the jars from over-zealous relatives who will eat it all without sharing it with you. Or, to avoid this awkward situation, triple or quadruple the recipe.

Sunday, September 5, 2010

Sun Dried Tomato & Mango Chutney

I love love love sun dried tomatoes. They remind me of happy summer days. Pair them with goat cheese, and you'll pretty much have me eating right out of your hand.

I wanted something easy for Labor Day weekend and found this wonderful Mango Chutney incorporating my beloved tomatoes and another favorite: mangoes. It sounded like a party waiting to happen.

Within 45 minutes I could have savory tomatoes and sweet mangoes ready to top any of the millions of varieties of grilled meats this weekend? Color me happy!

I followed the recipe almost exactly. But I can never leave well enough alone (and aren't recipes, like most other rules, really just suggested guidelines?). Instead of using crushed red peppers I opted for using whole dried peppers. That added another dimension of kick. And since my family is made up of Mexican, Puerto Ricans and Indians, food without spice is almost not worth serving.

Note: you can always remove the seeds from the peppers in order to lessen the heat. Or use the recommended crushed flakes.

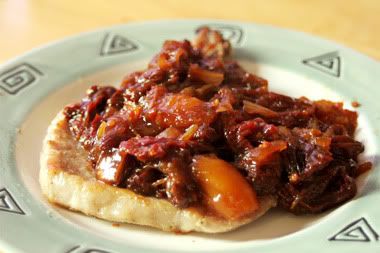
Served over pork. Mmmm.

Sun Dried Tomato & Mango Chutney
adapted from About.com Southern Food
Yields about 3 cups

2 cups water
1 1/2 cups coarsely chopped sweet onion
2 cups coarsely chopped mango
1 cup chopped dried tomatoes
1 cup raisins
1/2 teaspoon crushed dried red pepper flakes (or as many whole/seeded dried red peppers)
1/2 cup light brown sugar, firmly packed
1/3 cup red wine vinegar
2 teaspoons white vinegar
Preparation:

1. Combine the first 6 ingredients in a 3-quart saucepan; bring to a boil and simmer, stirring occasionally, for 15 minutes, or until tomatoes are softened.

2. Add remaining ingredients and simmer for 20 to 30 minutes, stirring occasionally, until most liquid has been absorbed.

3. Cool and pack in air-tight containers. May be kept in the refrigerator 2 to 3 weeks or frozen for up to 12 months.

Enjoy at your next barbecue with grilled meat, as a burger topping, or simply as a side dish. And happy Labor Day weekend!

Thursday, September 2, 2010

Caramalized Figs & Goat Cheese

I've been on a caramelization kick lately. For years I thought I didn't like onions, until I had caramelized onions in a grilled cheese sandwich, courtesy of the Grilled Cheese Truck. I fell in love. Then there were the caramelized scallops, also delicious. Finally I decided to play with fruits.

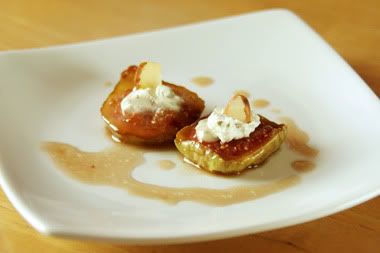
The story is typical: I had a friend coming to lunch and green figs on-hand, so I scoured the recipe logs for something to do with them. That led me to Gourmet Recipes' Goat Cheese & Caramelized Fig Bruschetta. I decided to cook the figs, per the recipe. But instead of putting them on cheese and bread, I flipped it: sweet figs as the base, topped with cheese. We were having pizza, so no additional bread was necessary, though the almonds made a nice topper.


Make sure the figs are firm, otherwise they will fall apart when cooking. Mine were beginning to get a bit soft, so halving them was a better route than slicing into various pieces.

I made this a second time for my parents, and we decided that the sauce could benefit from some brandy. Alcohol is completely optional (I've made it both times without), though it would make a lovely addition.

Caramelized Figs with Goat Cheese
Yields about 4-6 servings, depending on fig size

1 lb figs (about 20 small to medium sized figs)
1 tablespoon unsalted butter
1 tablespoon dark brown sugar
1 tablespoon of brandy (optionaloriginal recipe called for vodka, use your taste buds to guide you)
Creamy goat cheese
Slivered almonds

1. Stem and halve the figs.

2. Melt butter and sugar together in a skillet over medium-low heat. Once all the sugar has dissolved, add the figs cut side down. Fry for about 30 seconds on one side, then flip over to for about 10 more seconds on the second side. Work in batches to avoid crowding the pan.

3. Remove figs to serving plate. Top with a small amount of goat cheese and one sliver of almond each.

4. If using alcohol, add it to the skillet. Reduce the remaining sauce to a syrup-like consistency. Pour over figs and cheese. Serve warm.
Dessert: quick and easy.

Monday, August 30, 2010

Food Truck Madness at the OC Foodie Fest 2010

The LA food trucks are now as ubiquitous as the palm trees and fake-tanned celebrities. A quick check on Twitter will give you the details for any given lunch or happy hour (or just follow @FoodTruckLA for all the updates). Being the food lover that I am, I've been on a mission to try as many of them as possible.

Food trucks have even spawned their own food festivals. In the last month both Los Angeles and Long Beach have hosted their own, and this weekend it was Orange County's turn.

I'd had to miss the two local events, so when the chance came up to volunteer for OC Foodie Fest, I jumped at it. In the process I was able to hit two separate goals of trying at least one new truck and FINALLY meeting the crazily talented OakMonster of Hmm...Food...Good.

Oakley and I have "known" each other for the better part of a year. We have several real-life friends in common, follow each other on Twitter, and are connected on Facebook. We also worked less than half a mile apart and yet had NEVER been able to meet up. Until this past Saturday when we were paired together at check-in, where for four hours we helped scan very hungry and very enthusiastic food truck fans (like the boy above).

After our shift we got to roam around the event. It had been difficult to stand at check-in and watch the lines grow exponentially, knowing that we'd have slim to no chance of getting to experience some of the favorites. Most of the well-known trucks were there, including some of the crew from The Great Food Truck Race: Nom Nom Truck, Crepes Bonaparte and Nana Queen's Puddin' & Wings. The lines for these trucks in particular were beyond all limits of patience. Imagine Disneyland on the busiest day without a fast pass.

We decided to divide and conquer, setting our sights on two trucks we'd never tried and that had relatively short lines. Oakley took the OC-based Barcelona on the Go and I opted for LA's recently introduced Yatta Truck. How can you resist deep-fried cheeseburger rolls?

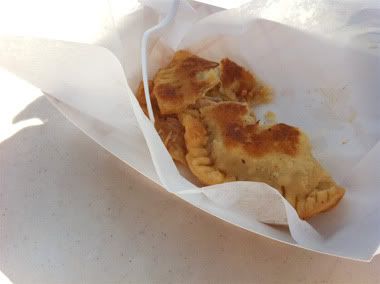
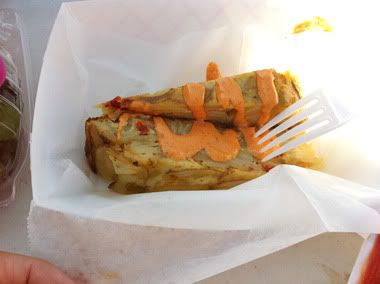
From the BOTG truck we ordered a fig and manchego salad (no picture) the chicken empanada (right) and a Spanish quesadilla (below).

The salad was absolutely forgettable. So much so that I forgot to take a picture of it. The empanada was not unlike ones my mom and I have made at home. Though not fried to a crisp like Argentinian turnovers, the filling was a bit greasy and under-seasoned. Disappointing. And since it was undoubtedly made of some sort of wheat based flour, I wasn't going to risk a reaction on it.

The quesadilla was interesting. Instead of just being filled with cheese, it was accompanied by a thick layer of potato and onion, and topped with a chipotle aioli. It wasn't bad. Different from the Mexican version I eat on a near-daily basis, but not bad.

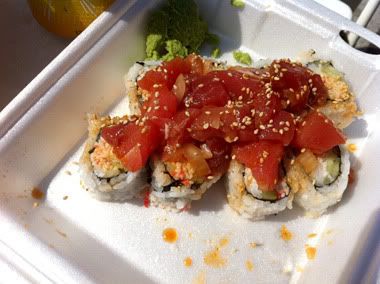
The Yatta Truck was a bit more exciting. There are five standard rolls to choose from, all inexpensive: $3.50 to $3.75 for four pieces, $6.50 to $7 for the super-sized eight pieces. You can also create your own roll by choosing up to four of twelve ingredients. I opted for the Poki ([right] tuna over a standard California rollwhich I usually despise, but the tuna made it delicious), the Sweet Aloha (deep fried teriyaki beef and pineapple) and the aforementioned All-American cheeseburger roll (a deep fried cheeseburger).
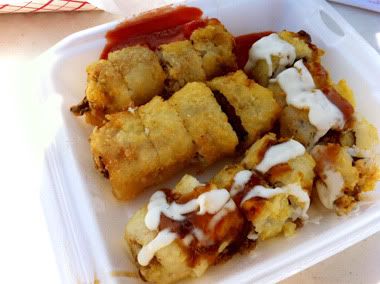
The All-American (left) is on top next to the ketchup, Sweet Aloha is covered in yummy sauces. Oakley and I agreed that the fried cheeseburger needed to be paired with beer. But we were too worn out to walk to the beer garden and stand in a long line. In fact, after gorging ourselves on all those carbs, the food coma started to set in.

There were so many other trucks I wanted to try, especially those that never go beyond the Orange Curtain into LA like Louk's To Go. But the lines were either much too long or, as in LudoBites' case, they closed up early. Plus, after standing in the sun checking in over 3,000 people over the course of four hours, we were positively drained. 

(My pictures were taken with my iPhone, but Oakley busted out her Nikon DSLR and shot what I'm sure are much more beautiful pictures. Follow her blog for more details.)

The organizers did a fantastic job of creating buzz about the event. I was getting multiple updates daily via both Facebook and Twitter as new sponsors and trucks signed up. On the day of, all 8500 tickets had already been sold. Though there were plenty of first run mishaps, I applaud them for putting together a wonderful fundraising campaign, gathering great sponsors and entertainment, and best of all, highlighting gluten-free options! The map we handed out at the entrance had all this info listed. Brilliant.

Good job OC Foodie Fest!